Preflighting Propellers
One way to tell if a pilot is serious about his responsibility to conduct a thorough preflight is if he looks at a propeller, notes that it’s still attached and…
One way to tell if a pilot is serious about his responsibility to conduct a thorough preflight is if he looks at a propeller, notes that it’s still attached and walks right by it to the other wing’s fuel drains. Even if it’s a relatively simple all-metal, one-piece, fixed-pitch affair, things can go wrong with it. If it’s a constant-speed or reversible model, it also has a lot of parts in the hub that retain and actuate its blades.
And it has a tough life. It’s often first to the scene of an incident, for example, and if it’s not properly secured or maintained, it can fail in spectacular ways, throwing blades and shaking engines out of their mounts. A few props have even decided to take the “goodbye, cruel world” route and departed the airplane entirely. It doesn’t have to be that way.
Hubs And Spinners
In between scheduled inspections and maintenance, the pilot is front and center when determining if a propeller remains airworthy and if it needs attention. It’s not hard to do a thorough preflight inspection on a propeller, but there are a few things you might not be looking for, or even recognize when you see them.
One of the first things we need to do before inspecting a propeller, however, is ensure there’s no way moving it can start the engine. With that in mind, you can’t move it if you don’t touch it, or at least if you don’t turn it. Even if with the keys in their pocket, people have been killed outright when the prop being inspected suddenly came to life. The moral is to treat every propeller as if it can start turning at any time.
Instead of turning the prop, and with it the engine, propeller pros recommend a four-step preflight test. First, try to move the prop blade fore and aft. Second, attempt to rotate the blade in its hub (fixed-pitch props need not apply). Third, push and pull the blade toward and away from the hub. Finally, try lifting and pushing down on the blade. If you succeed at any of those tasks, have someone competent take a closer look.
With that out of the way, the typical GA propeller has a spinner, often a one-piece metal cone secured to a round bulkhead mounted behind the prop. A series of screws attach the spinner to the bulkhead. The screws obviously should be present and secure, something it might be hard to verify without turning the prop. Don’t. Bend from the waist and use a flashlight if needed. Try to wiggle the spinner fore and aft. If it moves, it’s not properly secured.
You’re also looking for cracks in the spinner material, especially around the mounting screws. Thanks to wear and tear, older spinners may have slightly enlarged mounting holes; a loose screw may promote so-called “smoking,” where the metal around the screw exhibits a dark gray material. That’s aluminum oxide, a form of corrosion, and it means the screw (or rivet, for other aircraft components) is moving slightly. The same thing can happen between the spinner’s interior surface and the attaching bulkhead’s outer mounting rim.
It would be odd for a fixed-pitch prop to exhibit oil streaking—if it does, get a mechanic to look at it—but it’s more likely with a constant-speed/reversible model. If you do spot oil streaks or even a thin film, that’s a possible sign of a cracked hub, or at least a bad internal seal. Again, someone competent should examine it more closely.
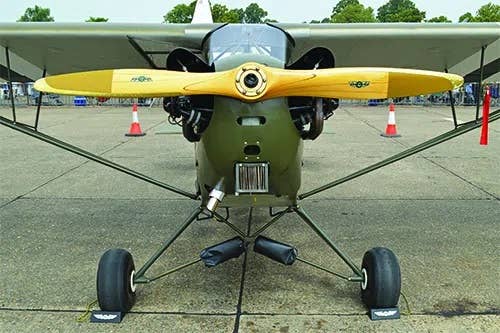
The vast majority of constant speed/reversible props have spinners installed. Many fixed-pitch props, like the one pictured at the bottom of the opposite page, don’t. That helps you perform a complete inspection because you want to make sure the bolts remain tight and that the safety wire hasn’t been disturbed.
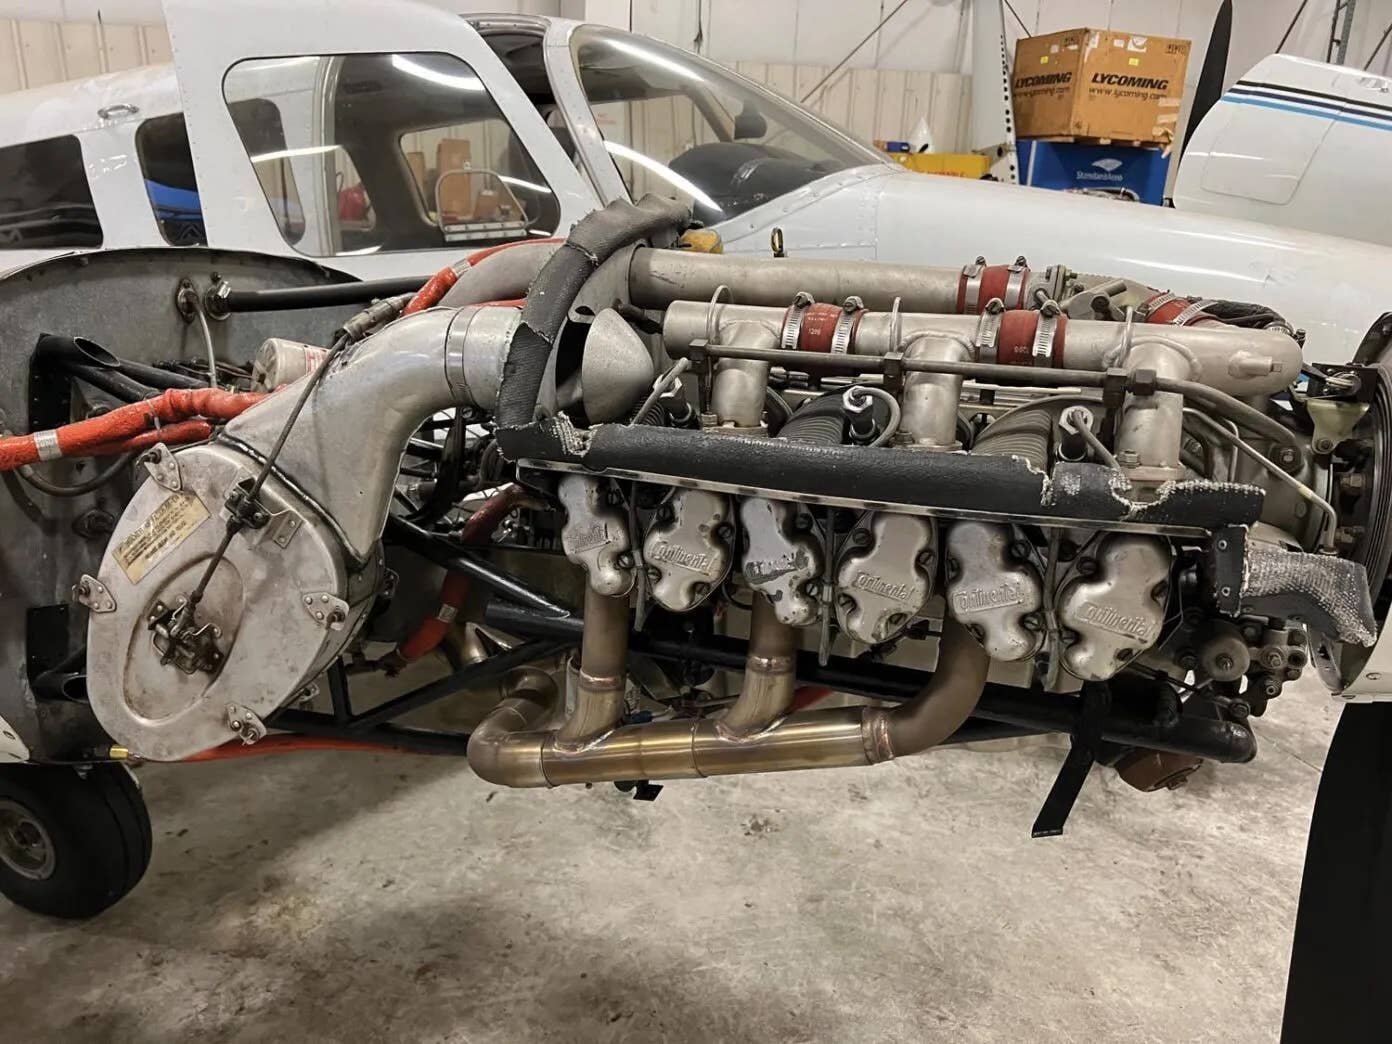
Any time a prop’s spinner isn’t installed, like in the image at upper right, is a good time to take a close look at those mounting bolts. It’s also a good time to examine the hub for signs of corrosion. Some hubs may have a high content of ferrous metals, so instead of smoking or white powder, they’ll exhibit plain old rust.
Blades

Propeller blades are airfoils turned 90 degrees to the oncoming air; they’re flat on the back side and have a curved front side, which is thick at the hub and thin at the tip. Just like a wing, leading edge contamination like bugs, or pitting from rain and/or corrosion, can reduce the blade’s efficiency.
As with propeller hubs, blade corrosion is especially problematic. Blades typically are painted with a high-quality coating to help prevent corrosion, and any missing paint will tend to promote it. For that reason, some manufacturers suggest keeping a light coat of oil on the blades. Also for that reason, you’ll spend a lot of time maintaining a polished prop.
Run a finger lightly over the prop’s leading edge to check for roughness and corrosion. A cheap terry cloth towel is a good tool here; if it snags on a part of the blade, it’s a good bet there’s a nick that needs to be addressed. Nicks with sharp edges can create a stress riser, increasing the likelihood of blade failure. A mechanic can file out shallow gouges.
A lot of foreign material on the blades, or a deep-enough gouge, has the potential to disturb the prop’s balance and increase vibration, which in turn gets transmitted throughout the airframe. Dead bugs or substantial dirt also can promote corrosion. Clean off the blades with an aluminum-friendly liquid, then wipe them down with a light oil.
Despite a propeller’s susceptibility to cracking and corrosion, most shops say pilots who taxi into things are their best customers. Pay attention to where you’re taxiing and slow the engine when over gravel or loose pavement, which is how they get nicked and gouged.
A decent preflight inspection, plus regular maintenance, means you’ll always have a poorly designed handle with which to move the airplane back in its hangar.
This article originally appeared in the August 2020 issue of Aviation Safety magazine.
For more great content like this, subscribe to Aviation Safety!