

Owning an airplane is a continual process of fixing things, ideally before they break badly enough to be a safety hazard or to keep you from flying. Most of us, though, also spend a lot of time sweating small details because we want our beloved airplanes to look and work their best. Cosmetics matter, and (at least for low-wing airplane owners) one easy cosmetic improvement is to make sure your non-skid wing walk looks crisp and sharp.
Of course, a wing walk isn’t just cosmetic; it’s important for safety, too: it makes it obvious where people should walk and it reduces the chances of slips and falls. Despite this importance, wing walks are often overlooked until they’re peeling, worn, or providing about as much traction as a freshly waxed kitchen floor. I recently refurbished the wing walk on my 1968 Baron; with a couple hours of effort, you too can make your wing walk look brand new without a big expense or a lengthy shop visit.
What you have vs what you want
The first step in refurbishing your wing walk is to determine what you have installed today. Some airplanes have painted-on wing walk surfaces, while others have adhesive-backed tape. In my Baron’s case, the wing walk was painted on, so it was natural to refurbish it with paint, and that’s what I’ll be covering here. Tape tends to peel and wear unevenly, and you’ll probably end up with peeling along the seams even if you’re very careful, so I don’t recommend using it.
Selecting a material
Opinions differ about the best type of paintable wing walk to use. There are 3 basic options: you can use a marine-style paint from your local boat shop, make your own by mixing clean white playground sand (or another type of grit if you prefer a grittier texture) in an appropriate paint, or splurging on Randolph’s purpose-made X-1567B wing walk compound.
Randolph’s paint costs about $37/quart but all the examples I saw on the Internet of people who used it looked terrific. Randolph combines an oil-based paint with a predictable grit size, and I wanted a surface with a little more grip to it. However, it only comes in gray and black, so if you want another color you’ll have to choose one of the other routes.
Surface prep is important
If you have self-adhesive wing walk, you’ll need to remove it. For adhesive-backed materials, heat is your friend. A hair dryer or heat gun on low setting will soften the adhesive, making removal significantly easier. Work slowly, peeling at shallow angles to minimize adhesive residue left behind. A plastic scraper or a beveled wooden kitchen spoon will help you scrape off the adhesive residue. I like and recommend Peerco 321 adhesive remover (available from Aircraft Spruce) for cleanup because it is relatively non-toxic and smells good, but 3M’s commonly-available automotive adhesive remover will work well too.
My existing wing walk paint wasn’t in bad shape, so I elected to paint over it. This is a matter of personal taste; the thought of applying a top coat instead of stripping down to bare metal horrifies some people. If that’s you, then you’ll need to figure out the most efficient way to remove the existing wing walk (and any underlying paint, if needed). My friend and former airplane partner Derek took the paint-removal approach when redoing the wing walk on his Cherokee Six.
Planning and taping
The first actual step towards painting is to clean the existing surface. Brush off any loose grit, and wash the surface to remove any dirt. Depending on condition, you may want to use a gentle paint-safe degreaser too (says the guy who once spilled a bottle of 20W-50 right down the wing walk.)
The next step is to decide whether you want to change anything about the geometry of your wing walk. In my case, the wing walk covered a roughly rectangular area on the wing and a trapezoid on the flap, and their edges didn’t line up. I mocked up a couple of shapes with 2” painters’ tape and decided that the original shape worked well.
With that decision made, I carefully applied tape along the edges of the area I wanted to paint. It’s a good idea to lay the tape a tiny bit wider (maybe 1/8”) than the existing area to make sure that the edges end up crisp and sharp, as wing walk paint often tends to fade first around the edges. Depending on your aircraft type, you may need to tape over, or around, inspection panels; on the Baron, I had a wing bolt cover to remove, and I decided to remove the inspection cover over the fuel tank sender because it has a radiused corner.
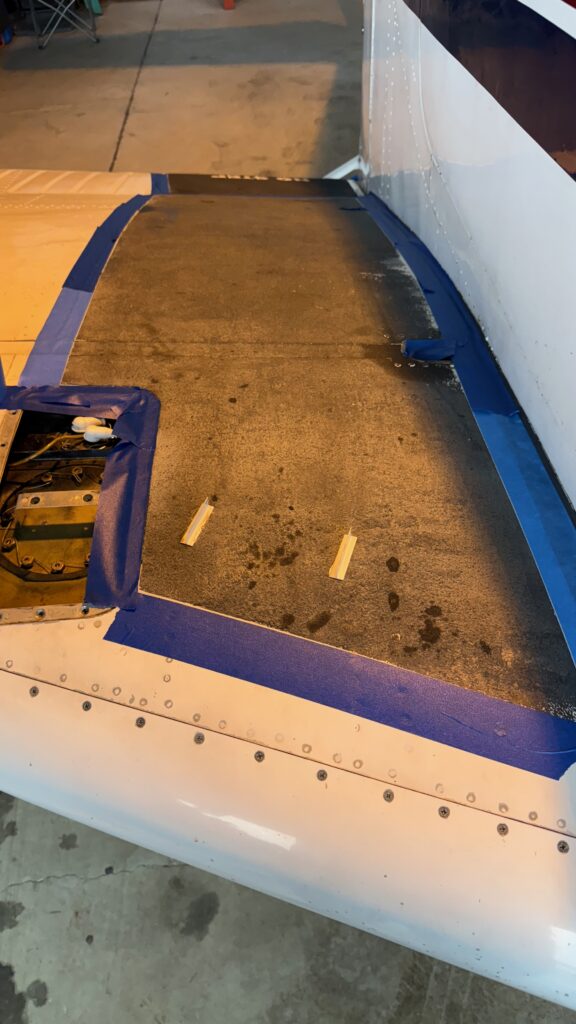
Take your time and make sure the tape lines are straight and that the tape is fully adhered, with no bubbles or gaps. The picture below shows what the tape looked like on the Baron once I got it lined up to my satisfaction; you can see the little white border I intentionally left to make sure I covered the old edges adequately.
Applying the compound
I chose to use a medium-nap 4” roller for the main application and a 1” foam brush for the edges, mostly because that’s what I had. I carefully mixed the Randolph paint, first by shaking the can for several minutes, then using a wooden stir stick, before pouring some of the paint into a tray and cutting in around the edges. Once I was satisfied with the edges, I began painting in the center area with the roller, then finished by painting the wing bolt cover. Pro tip: paint in the same direction whenever possible. I used the house painting tactic of changing the stroke angle and this led to an uneven pattern of grit in some spots.
As you paint you’ll need to keep an eye on the grit in your tray (or paint can), as it will settle due to gravity. To keep the grit pattern even, you may need to stir or remix the paint every so often.
Once you have the first coat on, let it dry for a few hours. Like other oil-based paints, you can easily clean up spills or spots with thinner, but you’ll have to be careful for the grit and make sure you clean it up too. I let mine dry overnight; the air temperature was in the mid-70s but with relatively high humidity (I live in Alabama), so I thought the extra drying time would be worthwhile.
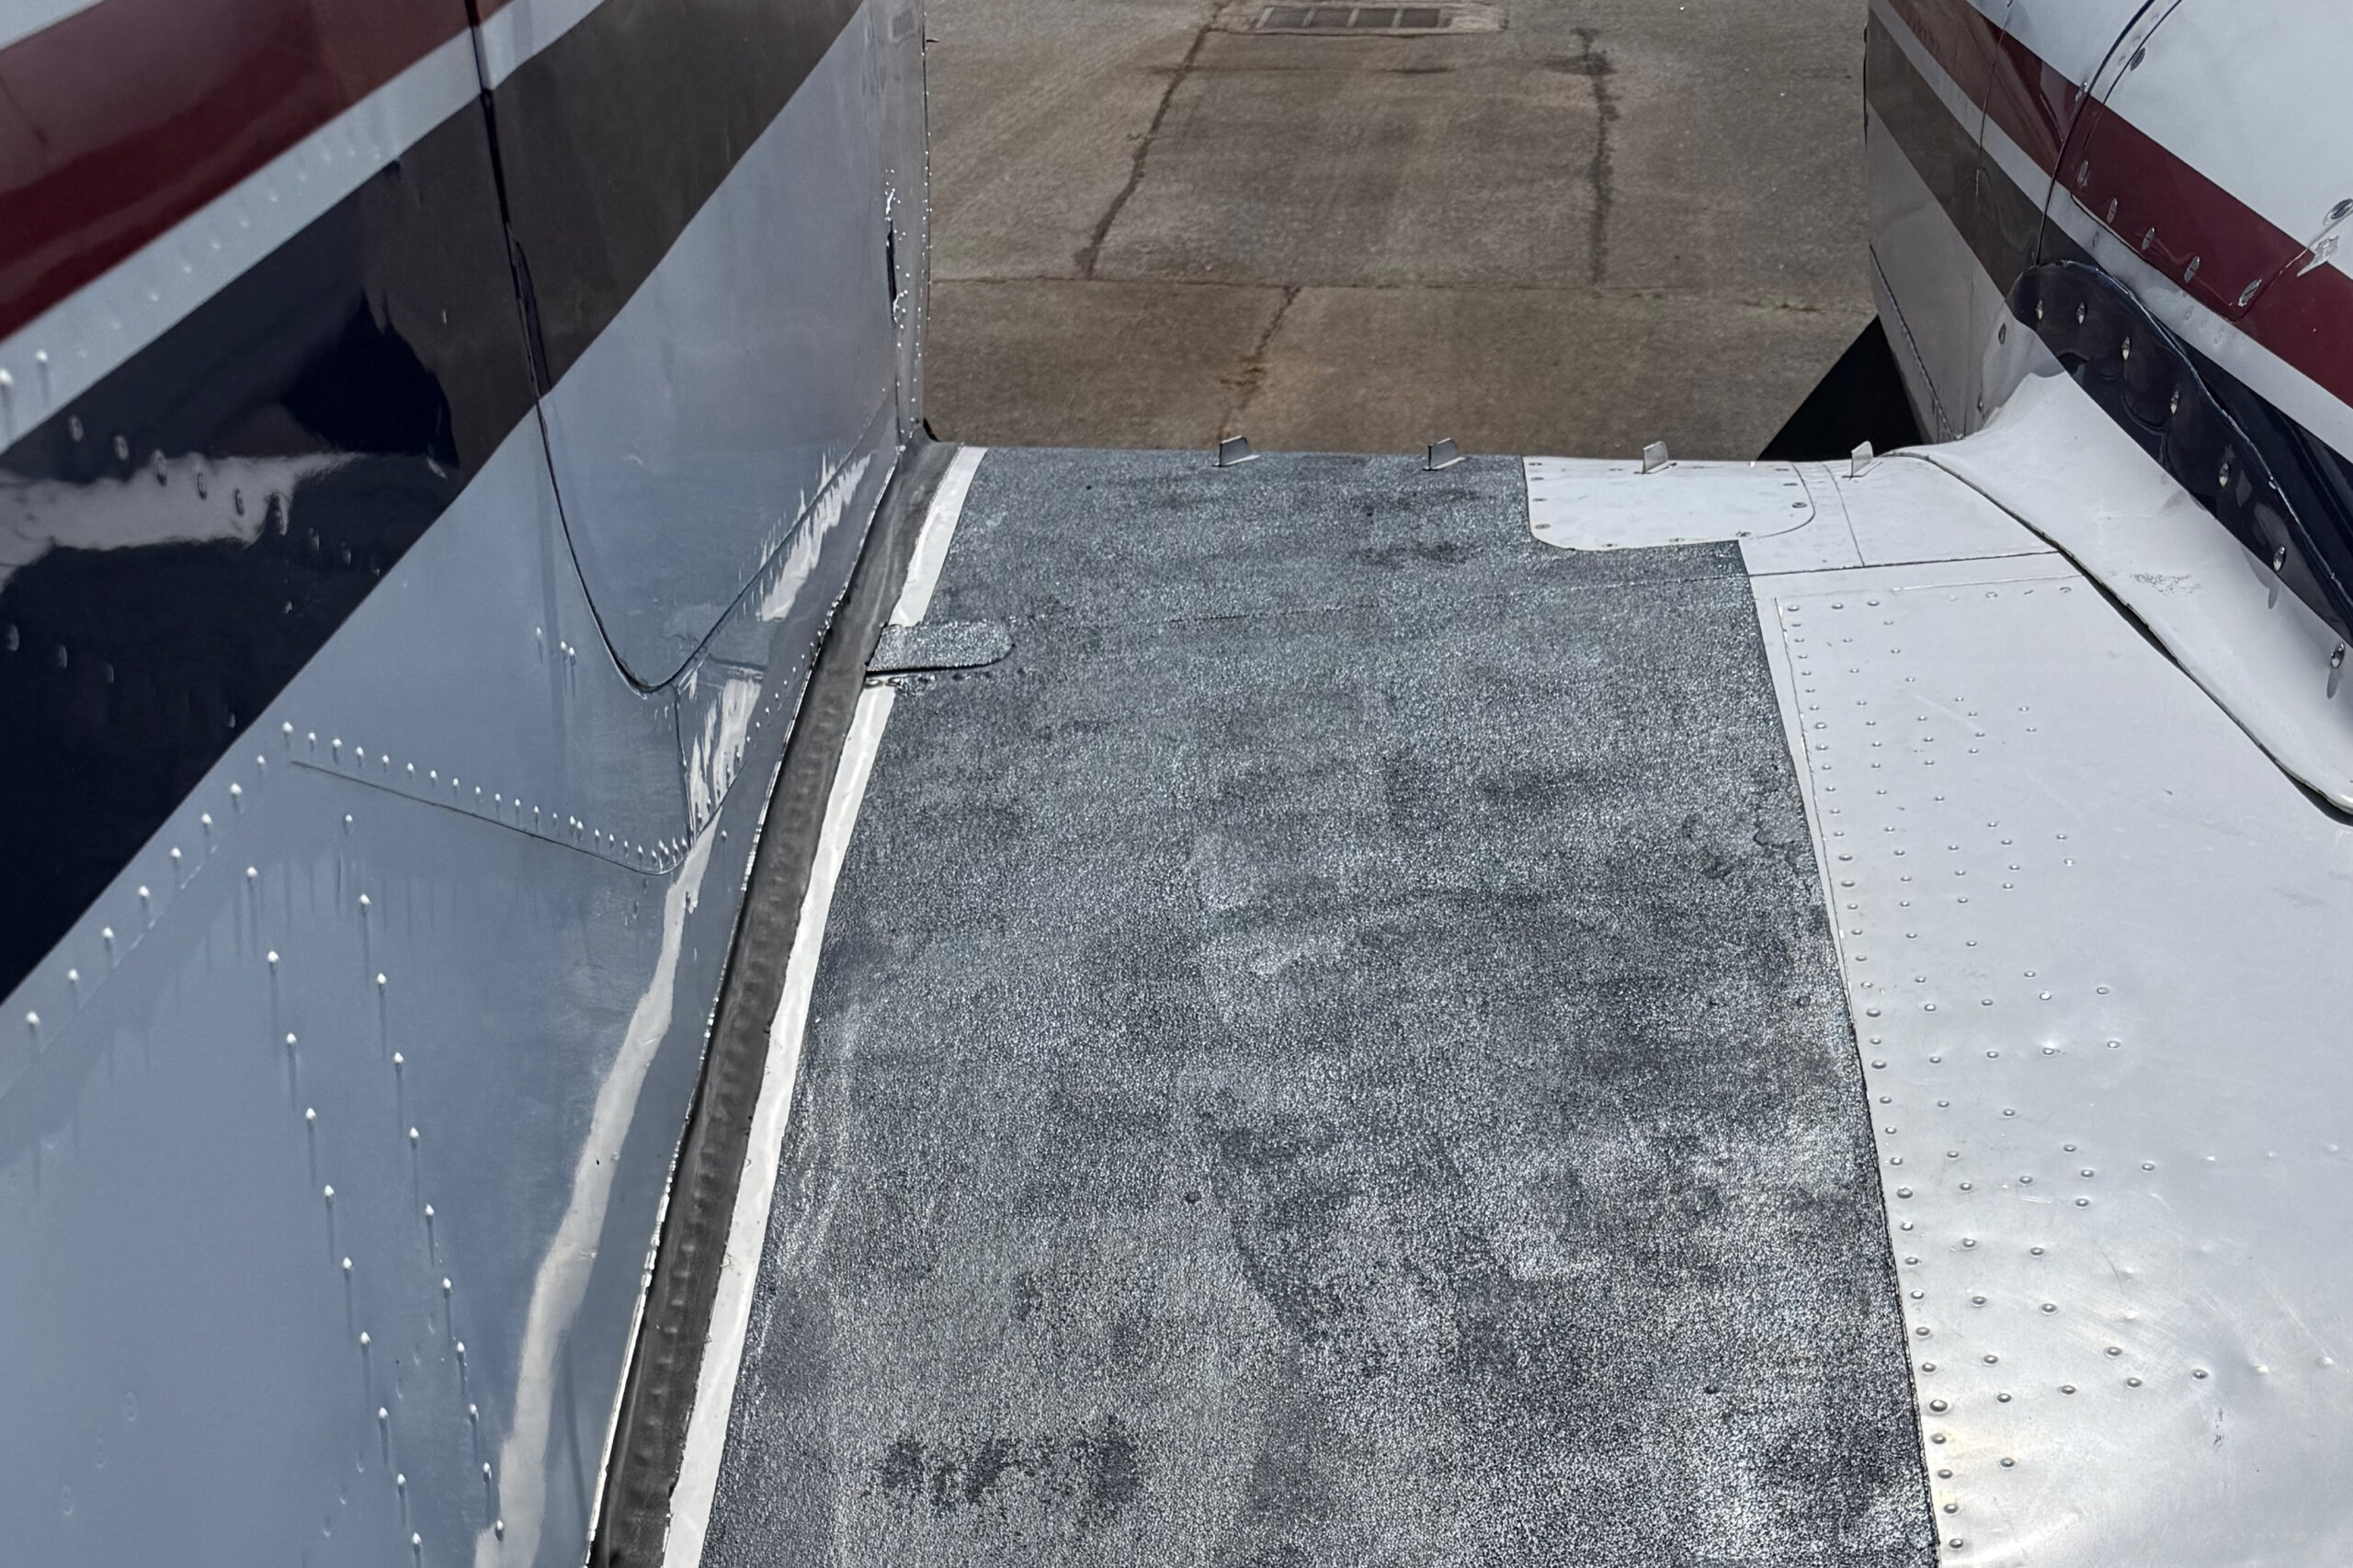
The next morning, I rolled the plane out into the sun, pulled off the tape, and took the picture below. Two things are evident: the grit pattern is a little uneven, and the former “NO STEP” label wasn’t adequately covered by only a single coat of paint. However, I had done a good job with the taping so the edges were clear and sharp, and even with the pattern issue the result was worlds better than the old paint.
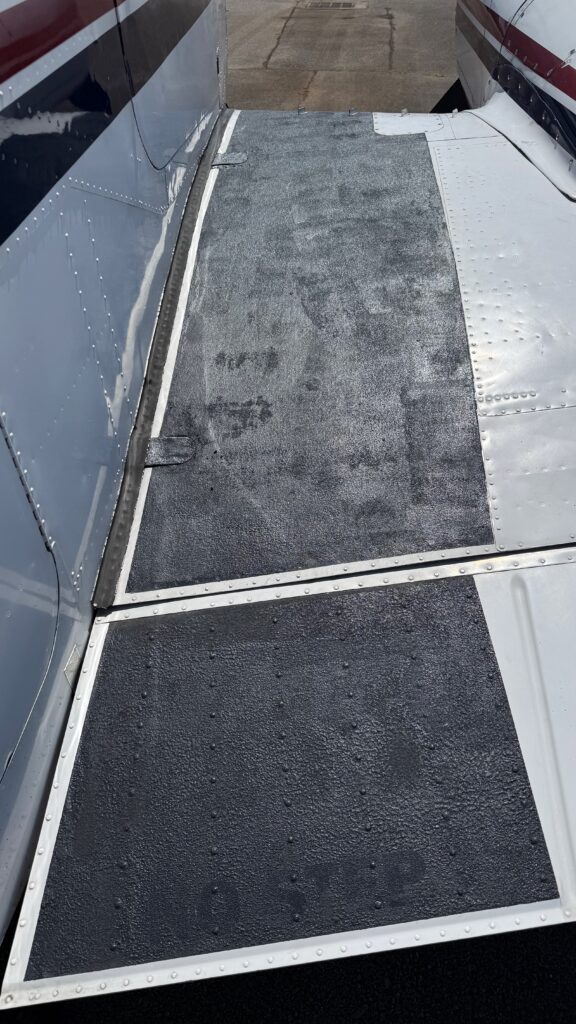
I flew for a couple of weeks before, at the next bad-weather weekend, re-taping the flap area and repainting it to cover the label. I also put a second coat on the upper area to even out the grain. The result looks great.
Summing up
For about $50 in materials and 3 hours of my time, I quickly improved the ramp appeal of my plane and made it less likely that I’ll slip and fall when it rains. That’s a terrific cost/benefit ratio, plus it was easy. Even if you’re not mechanically inclined, refurbishing your wing walk falls well within the scope of FAR 43 appendix A, and you’ll be delighted with how it looks when you’re done.
0 replies